Before you can start a full crawl in Central
Administration, you have to specify which content source should be crawled.
When you run a full crawl, all content in the content source is crawled even if
that content has already been added to the search index.
For this scenario, we'll crawl the Local SharePoint
sites content source.
- Go to Central
Administration --> Manage service applications --> Search
Service Application -- > Content Sources.
- On the Manage
Content Sources page, hover over the Local SharePoint sites
content source, and select Start Full Crawl from the menu.

The status of the crawl is shown in the Status
column.
- Refresh
this page until you see that the value in the Status column is Idle.
This means that the crawl has finished.

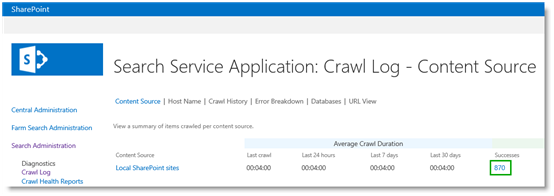
- Optionally,
you can verify that your items have been added to the search index by
clicking Crawl Log.
In our scenario, we now have 870 items in the search index, which is approximately the same amount of products we have in the Products list.
You can only start a full crawl manually. Nobody wants
the hassle of having to manually start a crawl every time a change is made to
their catalog content, as this is neither an efficient nor practical way to
work. So, to avoid this overhead, you can simply enable a continuous crawl
of your content source that contains the catalog.
Continuous crawls start automatically at set intervals.
Any changes that have been made to the catalog since the previous crawl, are
picked up by the crawler and added to the search index.
To enable continuous crawls:
- Go to Central
Administration --> Manage service applications --> Search
Service Application --> Content Sources.
- On the Manage
Content Sources page, click Your content source for which you want to
enable continuous crawl, in our scenario case, this is Local SharePoint
sites.
- Select the
option Enable Continuous Crawls.

The default interval for continuous crawls is 15 minutes.
You can set shorter intervals by using PowerShell. The code snippet below sets
the continuous crawl interval to 1 minute.
$ssa = Get-SPEnterpriseSearchServiceApplication
$ssa.SetProperty("ContinuousCrawlInterval", 1)
$ssa.SetProperty("ContinuousCrawlInterval", 1)
So, by enabling continuous crawls, you can avoid a lot of
frustration from content managers as they no longer have to wait for Search
service application administrators to start a crawl for them. However, for some
catalog changes, for example, enabling managed properties as refiners,
continuous crawls are not sufficient, and you will need to do a full reindexing
of the catalog content. But not to worry. Content managers have no reason for
concern, because there is a way for them to initiate a full reindexing of the
catalog.
To mark a catalog for reindexing, here's what to do:
- On your
catalog (in our case the Products list in the Product Catalog Site
Collection), click the LIST tab --> List Settings --> Advanced
Settings.
- On the Advanced
Settings page, click Reindex List.

You can view the crawl status and schedule for an individual
catalog. To do this:
- On your
catalog (in our case the Products list in the Product Catalog Site
Collection), click the LIST tab --> List Settings --> Catalog
Settings.
- On the Catalog
Settings page, you can see when the catalog was last crawled, and what
crawls are scheduled to run when.
In our case, we can see that the catalog was last crawled on 3/4/2013 at 5:30:17 AM, and that continuous crawls are scheduled to run every 15 minutes.

So, all in all, content managers can be happy because
their content is added to the search index at short intervals, and Search
service application administrators can be happy because they are no longer
bothered by content managers constantly asking them to start a crawl.
No comments:
Post a Comment